How do you prefer to proceed?

Book a call
Talk to a content experts to determine if Lychee could help you


Already have an account? Login here
How do you prefer to proceed?
Book a call
Talk to a content experts to determine if Lychee could help you
Already have an account? Login here
Desktop only allows you to upload pre-created files where as on mobile, you can create the video in the app itself. If you already have your video file ready to go, there’s really not a big difference between desktop and mobile. But if you need to edit things, add music, or do any kind of work on the video, go mobile.
Keep in mind that the screenshots are of the desktop view. But the icons and the flow is very similar on mobile so you can follow along either way!
Open Instagram on your web-browser or on your phone.
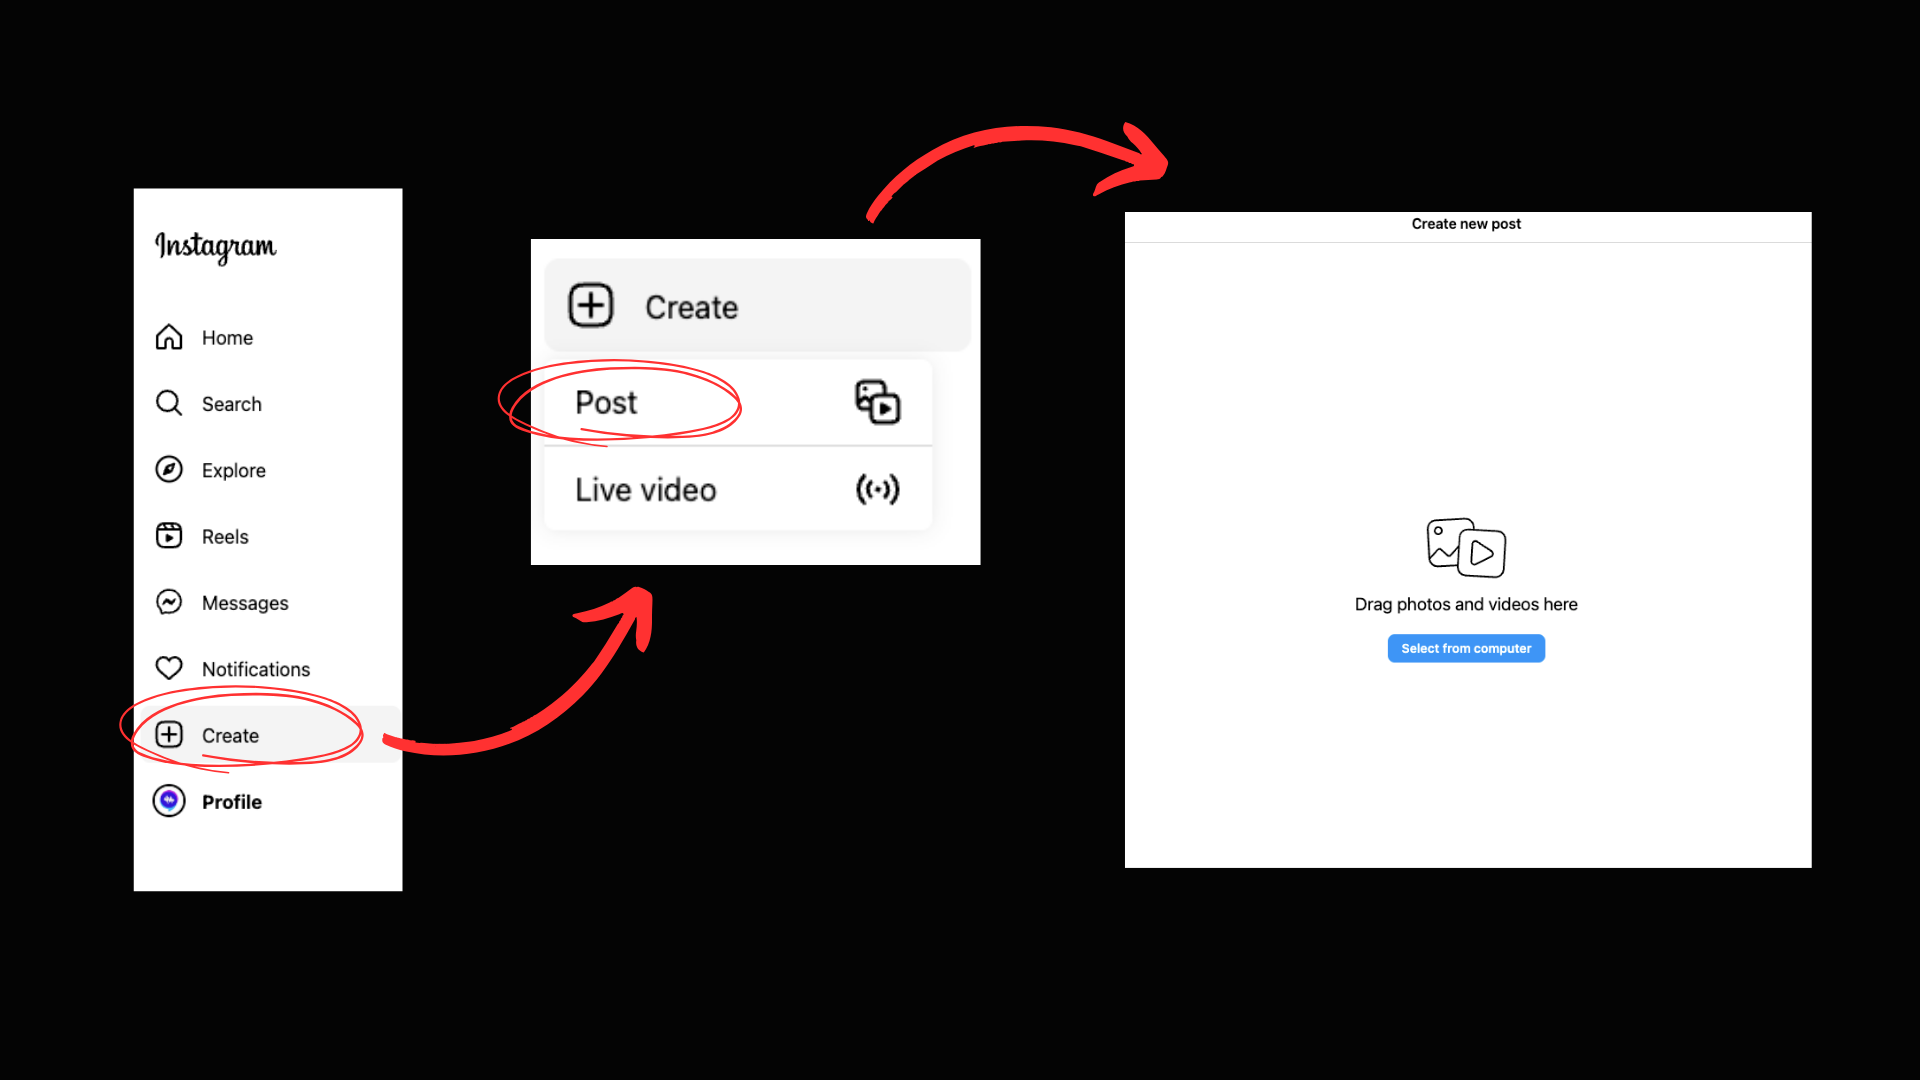
On desktop: Go to the bottom left side of the navigation bar and click on Create. It should give you two options: Post or Live Video. Click on Post. A pop up will appear prompting you to add your video file. Select the appropriate file from your computer.
On mobile: Go to the bottom center of the navigation bar and click Create. Your camera roll should open up so you can either select the video file or combine the clips to make a new video. You’ll have more options like adding music or filters but if your video is already ready, you can go ahead and click next.
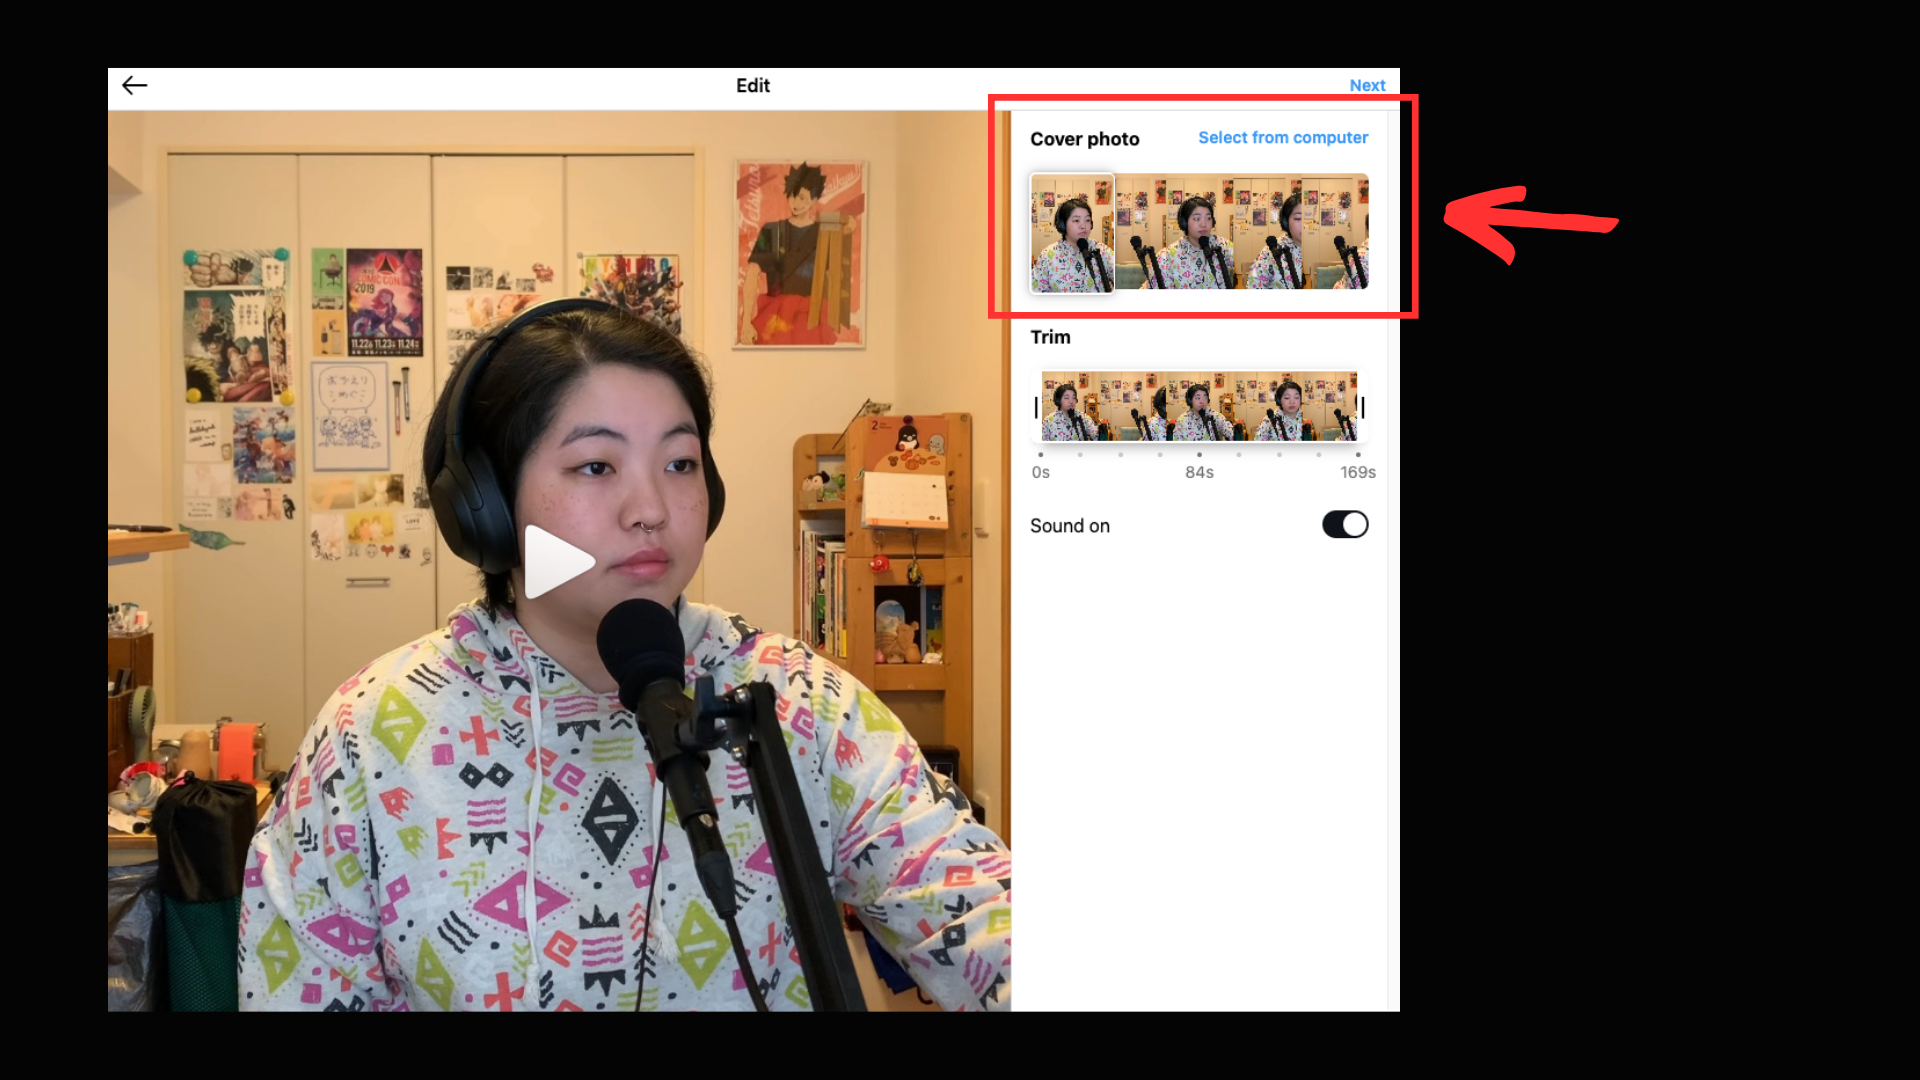
After uploading your video, you will be asked to pick a cover photo. (In this example the video was very long so it also prompted me to trim the video but you shouldn’t have this issue if your file is short enough!) You can either select a frame from the video itself or upload a custom image. Selecting a frame from the video itself is the simplest, but if you have the extra time, we recommend uploading a custom image since you have more control over what information can be seen in it. For example:
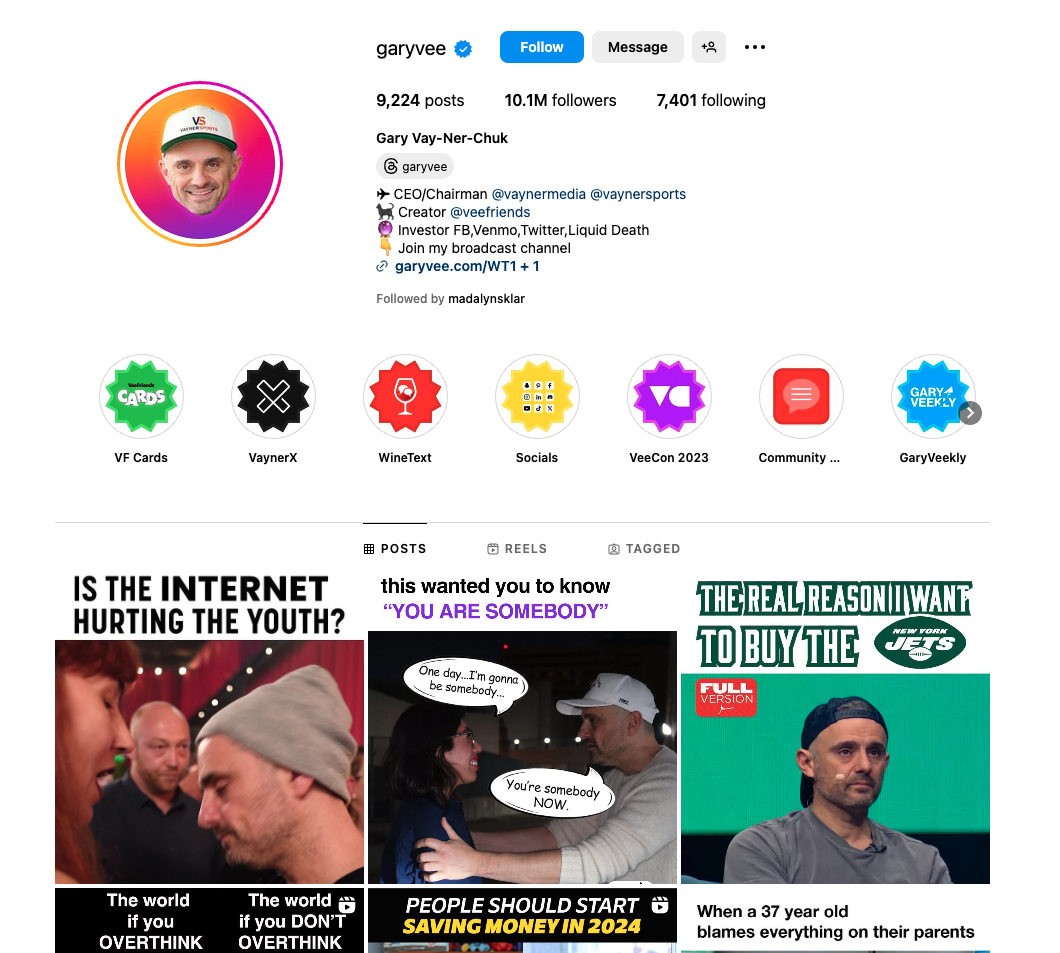
Gary Vee’s Instagram is full of Reels but he has custom thumbnails on them, making it easy to tell which videos are about what. An easy way to make custom thumbnails is to use a service called Canva. They have easy to use templates, so try playing around with the service! But again, this is optional!
.png)
Lastly, you’re asked to tag people, write your caption, and add location information if relevant. Captions can be the hardest part of posting a video so in the next section, we’ll discuss what you should include in a killer caption!
A call to action (CTA) is a great way to get your audience to engage with your content. The ideal CTA really depends on what you want your audience to do.
Whatever it is that you want them to do, make sure to make it clear and EASY for them to do! No one wants to jump through 3 different hoops to get to your website.
The days of cramming trending hashtags just because it has a lot of reach is long over. Hashtags are used to help categorize your content rather than promoting it, so make sure to use relevant hashtags. Using hashtags that aren’t relevant can actually be more damaging because the algorithm will be confused about what your content is. Try to choose between 3 to 15 hashtags that are a mix of specific and broad categorizations of your content.
Once you’ve posted your reel, don’t stop there! Take advantage of the stories feature on Instagram to get more eyes onto your post!
